By learning how to stop recording effectively, you can avoid common issues like incomplete recordings or unnecessary file sizes for all your future meetings.
Who Can Stop The Meeting Recording?
The meeting organizer or any participant using an MS Teams licensed user account can start or stop the recording during a meeting. However, guests or attendees from other organizations won’t have the ability to control the recording, as this option is restricted to those with an MS Teams account.
Important to note:
- Recording continues automatically if the person who started them leaves.
- The host should end the recording or the meeting if they're leaving.
- Recordings will end automatically if everyone leaves or after four hours.
How To Stop Recording Your Microsoft Teams
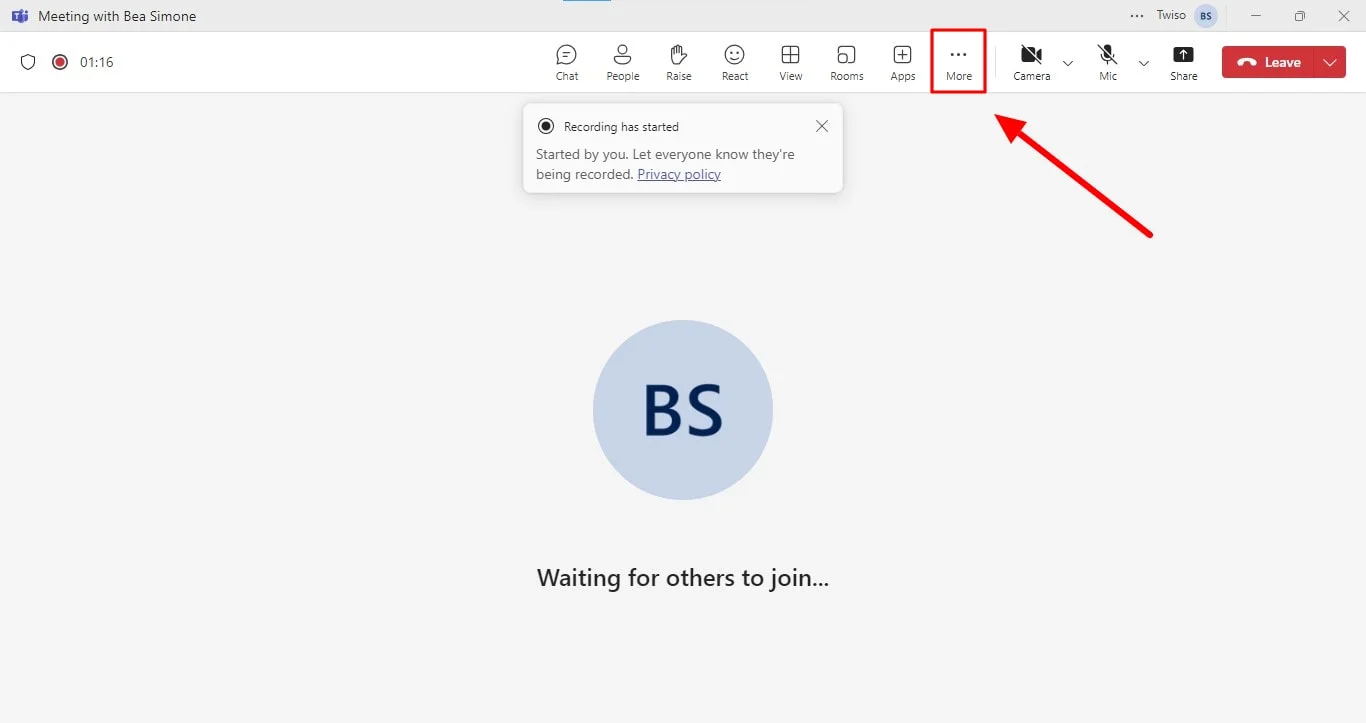
- In the meeting controls, click on More Actions.
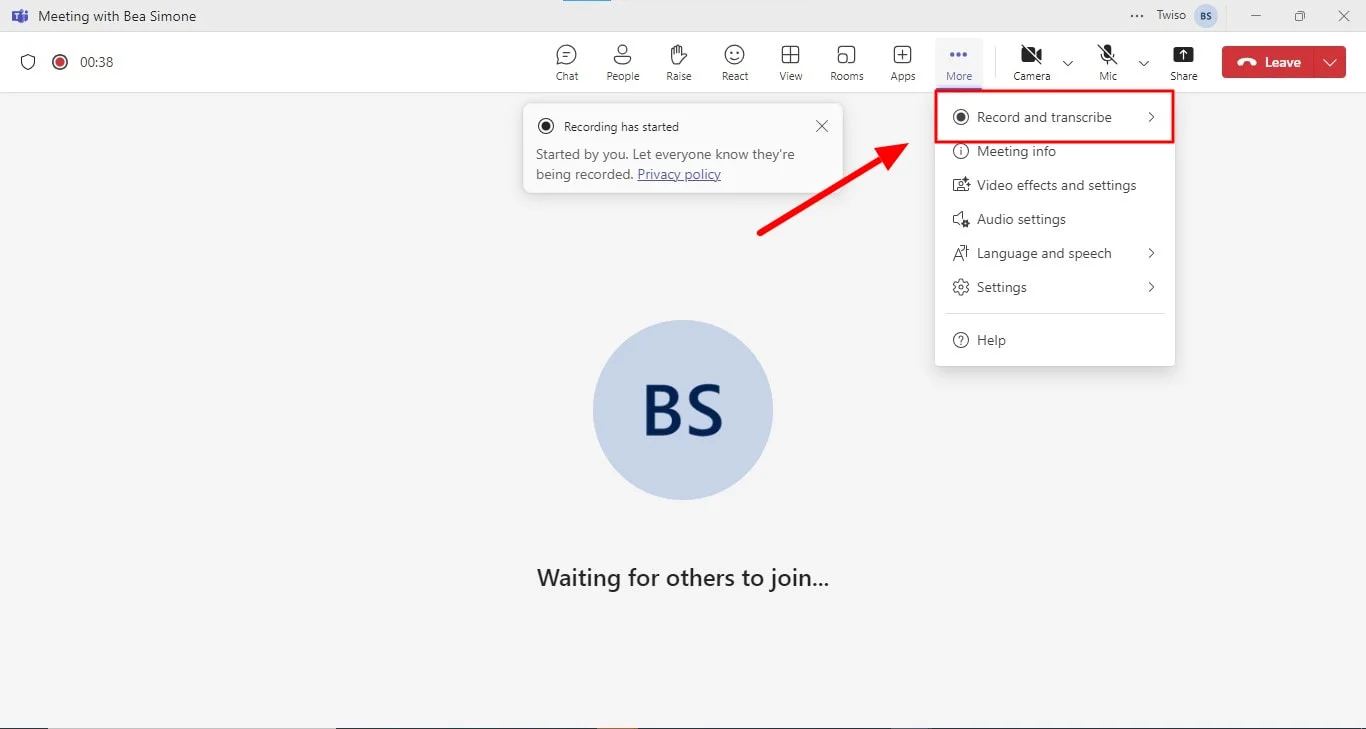
- Click on Record and transcribe in the drop-down menu.
- Then, choose one of the following options:
- Finish recording to end both the recording and live transcription.
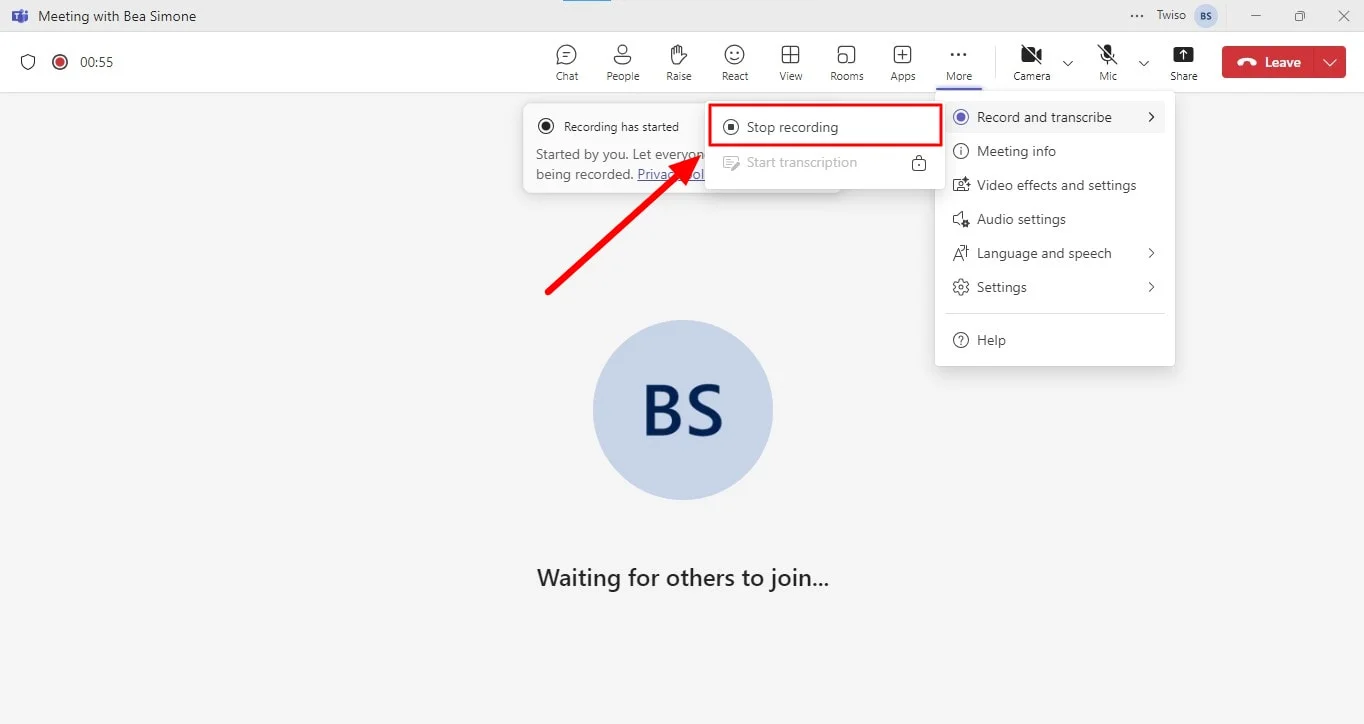
- Stop transcription to stop the live transcription only, while the recording will continue until you select Stop recording.
Where To Find Your Meeting Recordings
Once you've finished recording a Teams meeting, you can easily access the recording for future reference or sharing. The location where the recording is stored and saved will depend on the type of meeting you conducted.
For meetings held in channels:
- Meeting chat or channel meetings: The recorded meeting will be automatically added to the specific chat or channel conversation where the meeting took place. This makes it simple to find and replay the recording within the context of the original discussion.
For meetings that were held in non channel meetings:
- OneDrive for Business: The meeting organizer has a OneDrive account that will store the processed recording. This means you can access the recording directly from your OneDrive, providing you with a centralized location for managing and organizing your meeting recording.
Note: The recording will typically be processed and saved within a short time after the meeting concludes. Once it's ready to view, you'll receive a notification indicating its availability.
Tips For Recording Your Teams Meeting
- Start recording early: To ensure you capture all important moments, start recording as soon as the meeting begins. Use the meeting controls to initiate the recording, and notify participants that the recording has started.
- Use the chat: Keep the meeting chat open when you start recording. This allows participants to refer to or share important information in real-time and ensures all discussion points are captured in the meeting recording.
- Monitor screen sharing activity: If screen sharing is part of your meeting, verify that it's correctly displayed in the recording, especially in non channel meetings to ensure peoples video streams display correctly.
- Organize channel meetings: For meetings held in a channel, the recording will automatically appear in the channel conversation. This makes it easy for all channel members to access and make sure the meeting recording shows.
- Access recordings via OneDrive: After the meeting, the recording will be saved to the meeting organizer’s OneDrive for Business. This central location allows for easy retrieval and sharing of the meeting recording.
- Review meeting recordings: Check the meeting recording after the meeting to ensure that both audio and screen-sharing activities were captured as expected.
- Communicate with participants: Make sure all attendees, whether from the same org or different organizations, are aware that the meeting is being recorded.
Conclusion
Stopping a recording in Teams is a crucial step in managing your meeting content. By understanding the process and the benefits involved, you can effectively control the duration and scope of your recordings.
Bluedot is the ideal tool for recording your Microsoft Teams meetings, and can even capture audio, especially when you or someone else is sharing their screen. Beyond recording, for example, Bluedot offers a comprehensive suite of features that enhance your meeting experience. These include:


