Have you ever been in a Google Meet call plagued by frustrating audio problems? Muffled voices, echoes, or background noise can quickly derail a meeting. But fear not! This guide is your one-stop shop for fixing common Google Meet video call audio issues.
We'll provide you with some troubleshooting tips to get you back on track. Whether you're using a computer or mobile device, our resources will equip you with the knowledge to troubleshoot effectively.
5 Ways To Fix Google Meets Audio Issues
When you join a Google Meet, the audio not functioning on Google Meet could be caused by various factors. These include improper device connections or devices being turned off, too many open Chrome browser tabs lack of microphone access permissions, Chrome browser, or applications, non-default microphone settings, and potential issues within Google Meet's settings.
Having identified these potential causes, let's explore the 5 of the most efficient solutions to address the audio problems on Meet.
1. Check your Google Meet audio before your meeting
Before troubleshooting, it's helpful to do some simple checks, like your sound settings and making sure your devices are connected, and your microphone isn't muted. Doing these checks and testing your audio before a meeting can save you from awkward moments, like when your Meet sound doesn't work during a presentation.
Here's how to test your sound on Google Meet:
1. Start the meeting using the video link provided in the app or calendar invite. Don't click "Enter the Meeting" yet.
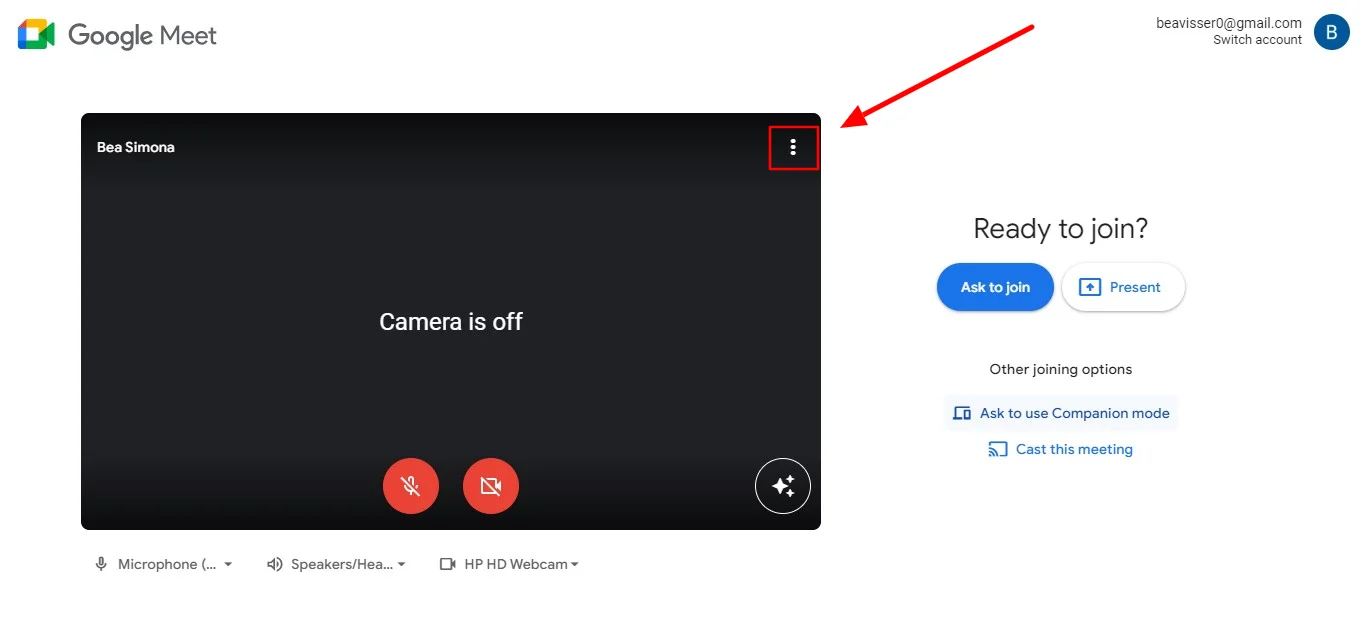
2. Tap the three dots at the top-right corner of the self-view for more options.
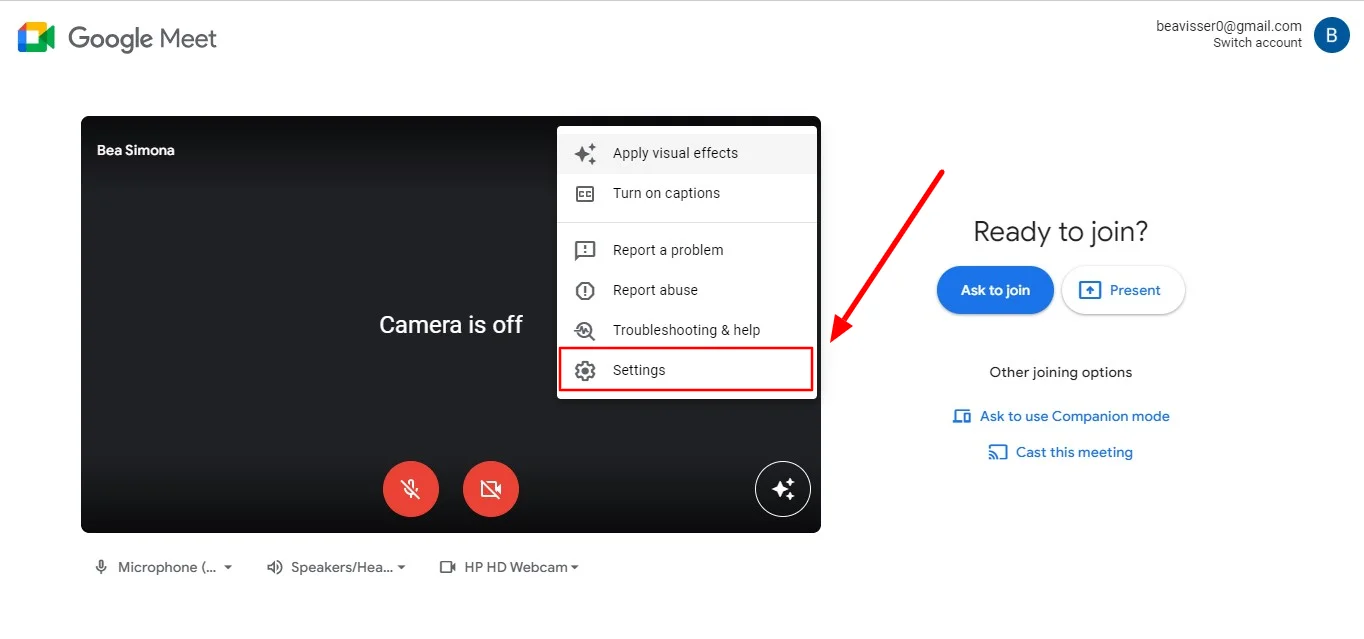
3. Pick "Settings."
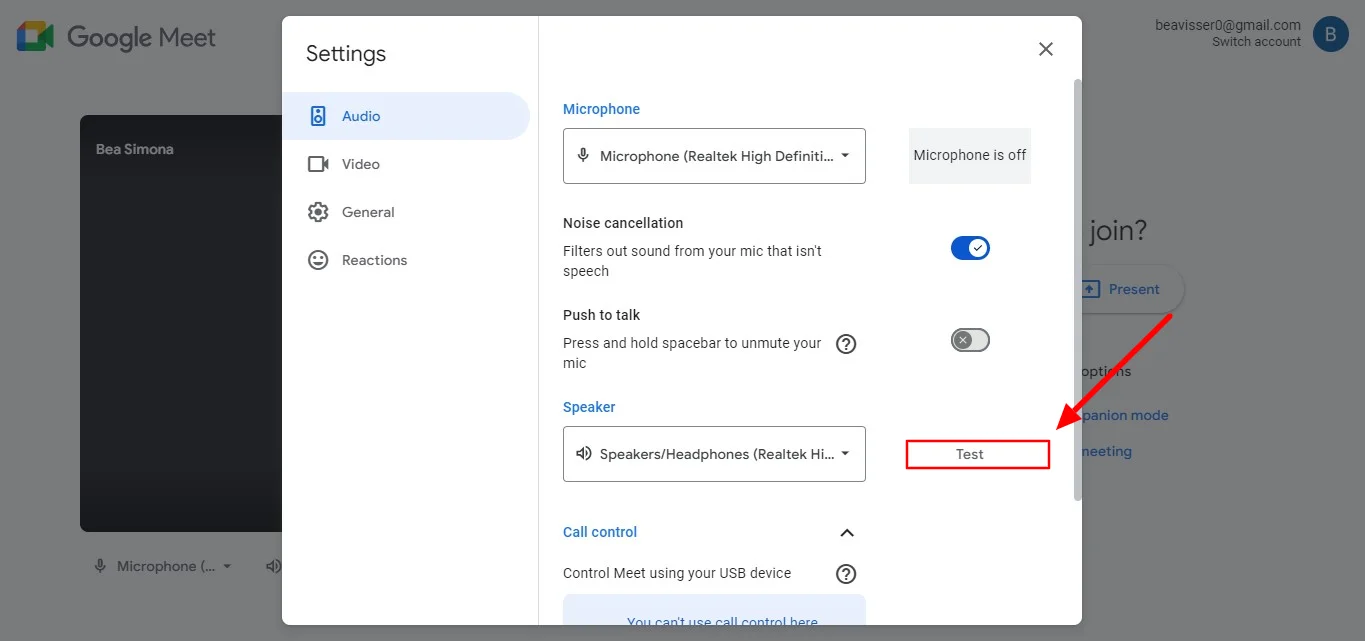
4. Make sure that your microphone and speaker settings are the correct ones for the meeting.
5. Click "Test" next to the speaker icon.
2. Grant required permissions to avoid audio problems
If you're experiencing Google Meet audio issues on Windows 10/11, it could be due to browser, operating system, or application permissions. You'll need to grant microphone access to resolve this problem.
1. Press the X and I keys together to open the Settings panel.
2. Select Privacy from the menu that appears.
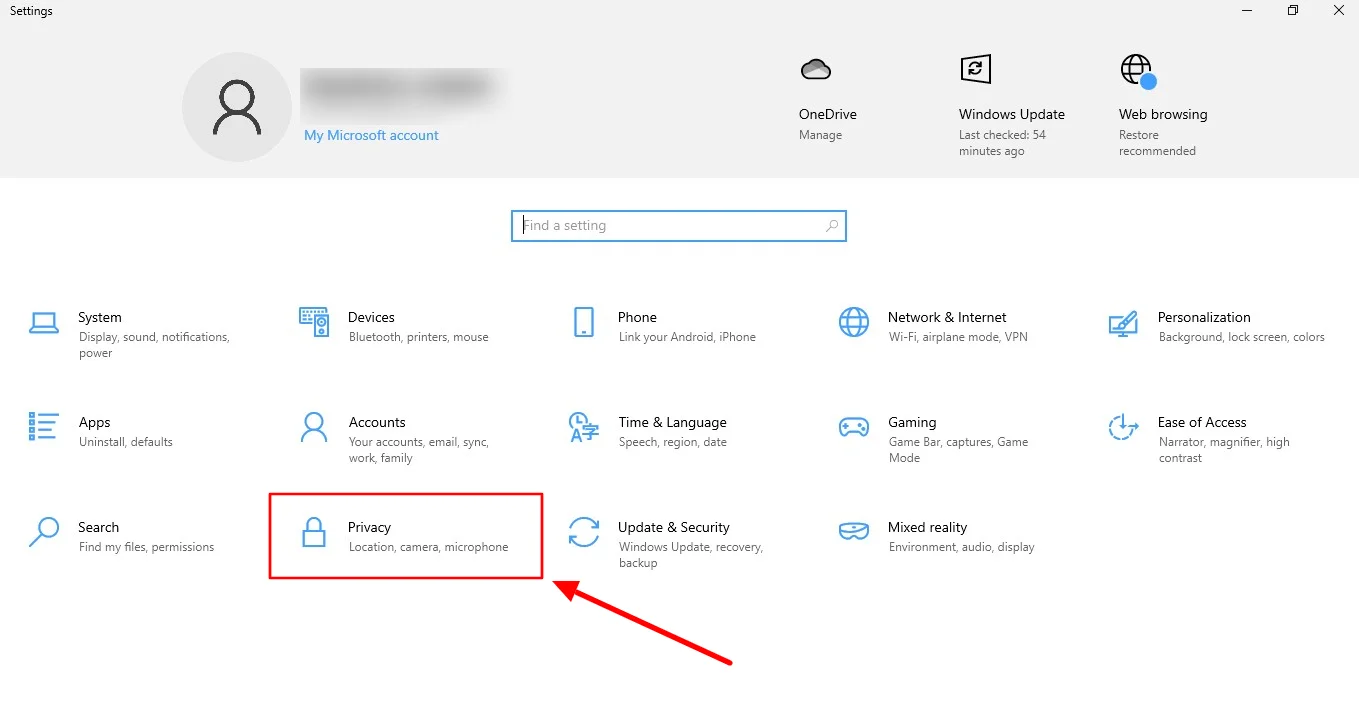
3. Navigate to the Microphone option on the left-hand side.
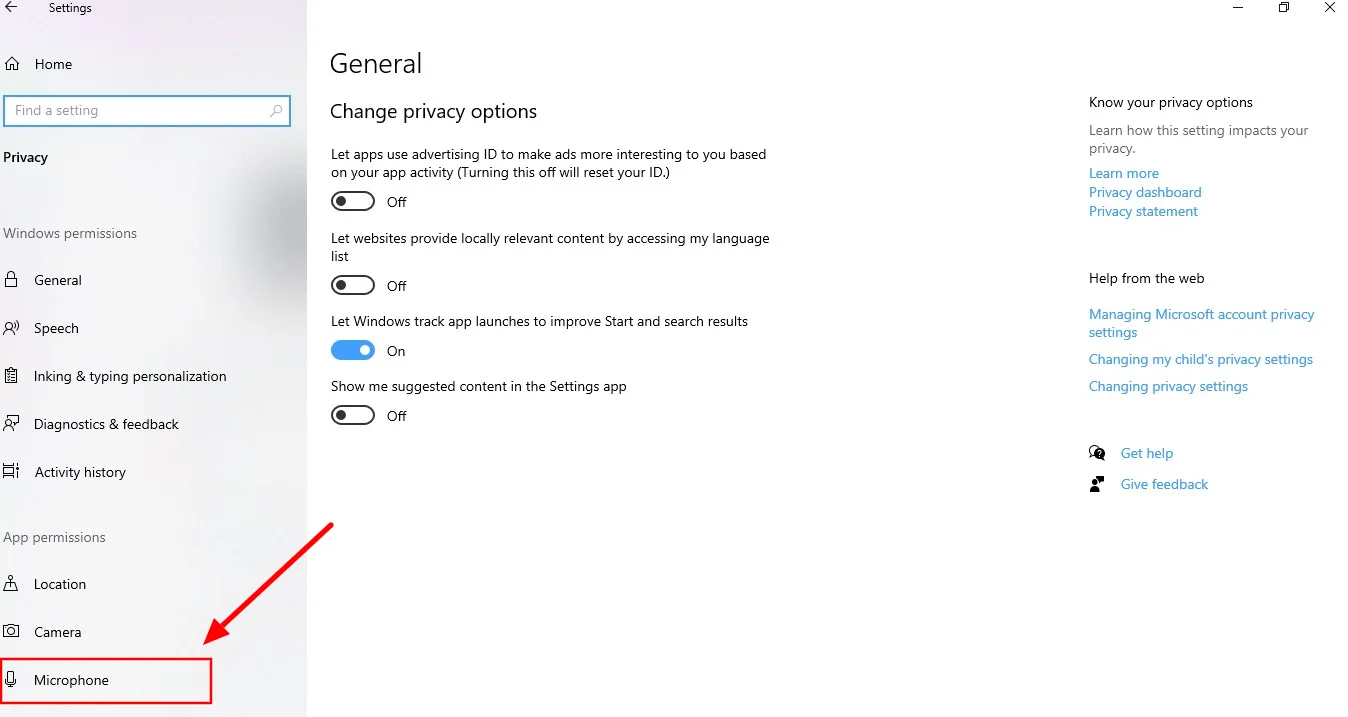
4. Click on the button to adjust settings.
5. Turn on "Microphone access for this device."
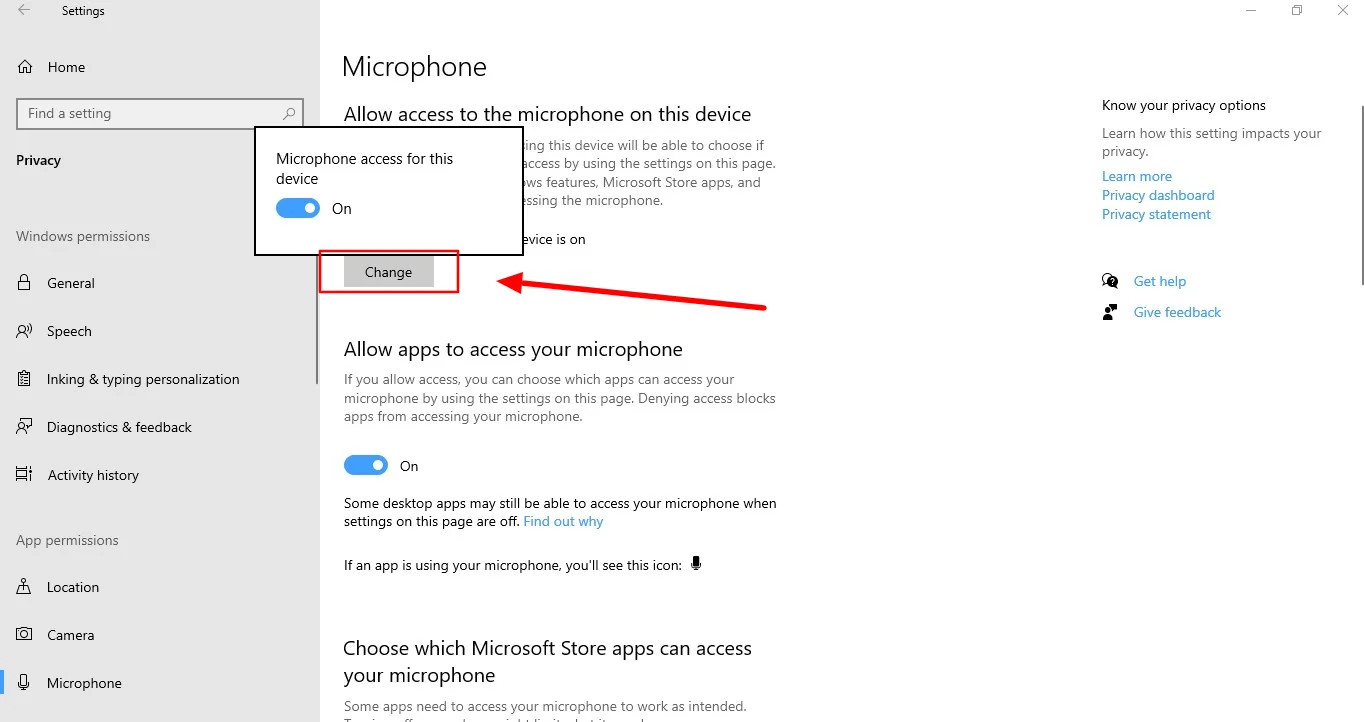
6. Scroll down to allow apps and desktop apps access to your microphone.
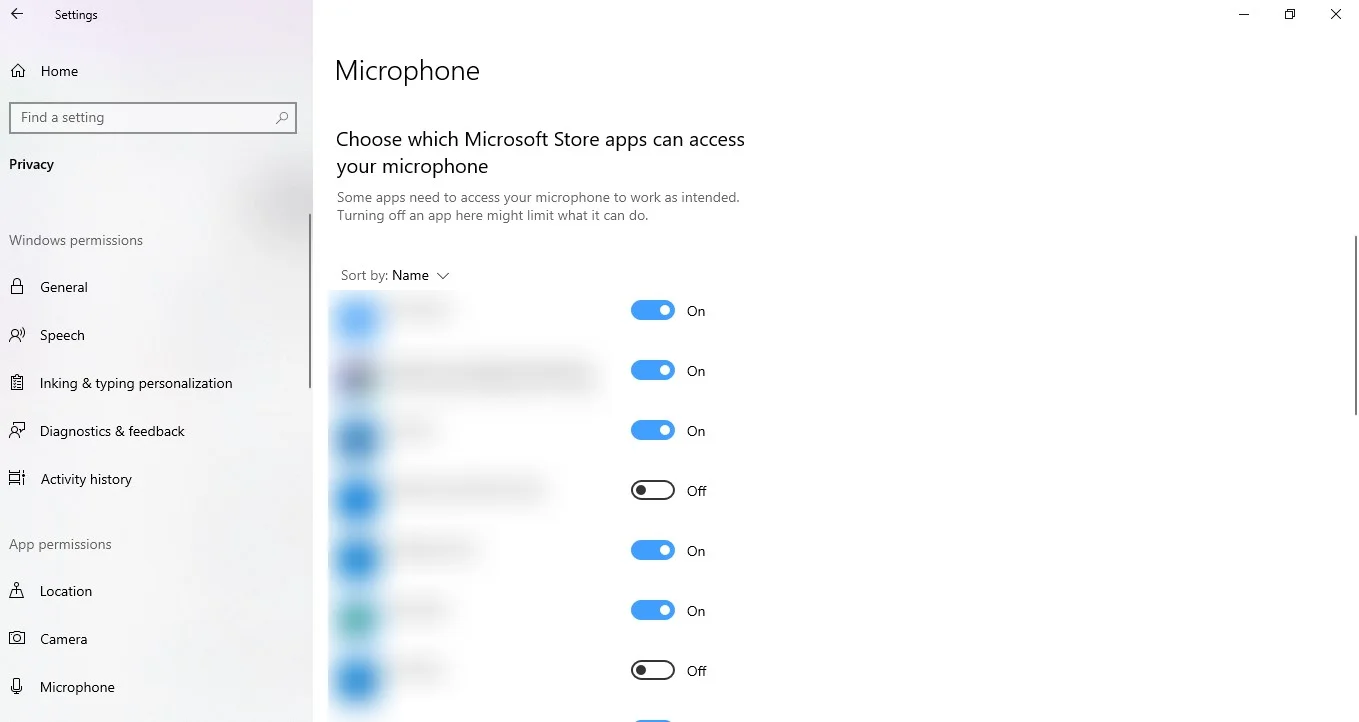
7. After making these changes, check if the Google Meet audio problem persists.
3. Turn off your Bluetooth
You may have utilized Bluetooth on your phone, PC, or Mac to link headphones, True Wireless Stereo (TWS) devices, or other apps. Many users often overlook turning off Bluetooth after usage. Subsequently, when you initiate a Google meeting again, it might activate Bluetooth and connect to a previously paired device.
4. Make the correct microphone your default audio device
Google Meet typically selects the default audio device, which can lead to issues like Meets audio not functioning on a laptop. To avoid microphone issues, you can follow these steps to designate the microphone system settings you want to use for your Google Meet session as the default and ensure its settings are correct.
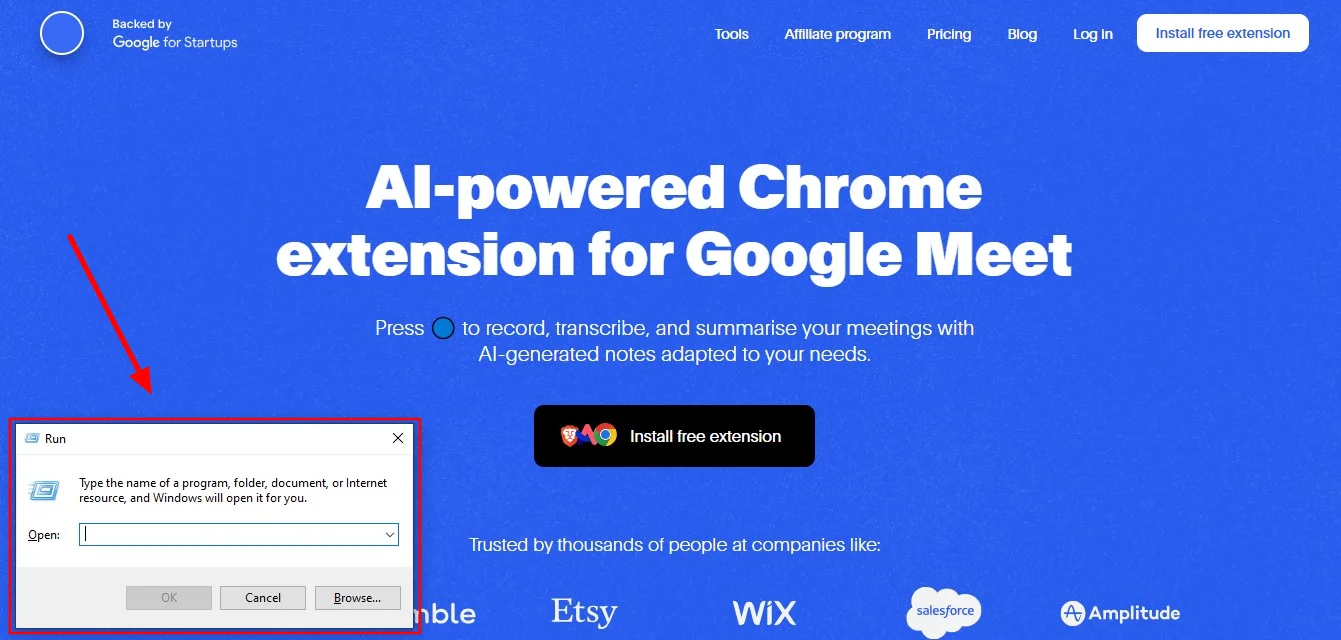
1. Press the Windows and R keys simultaneously to open the Run utility.
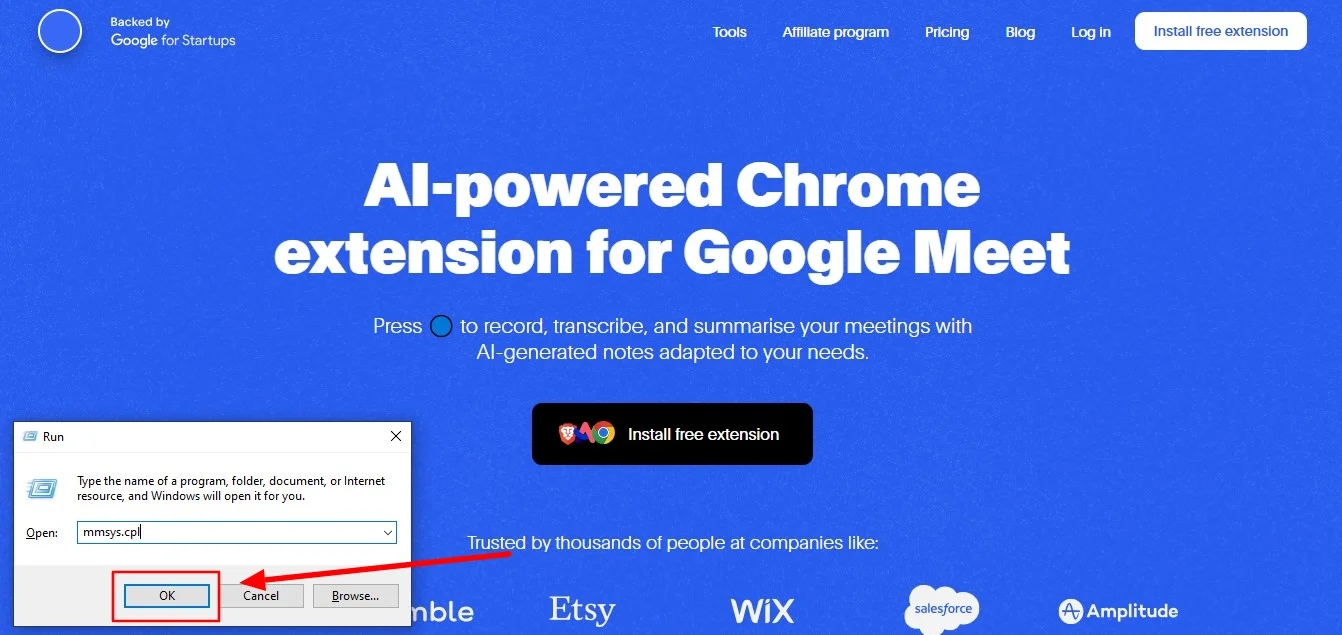
2. Type in "mmsys.cpl" and click OK to open the sound dialog box.
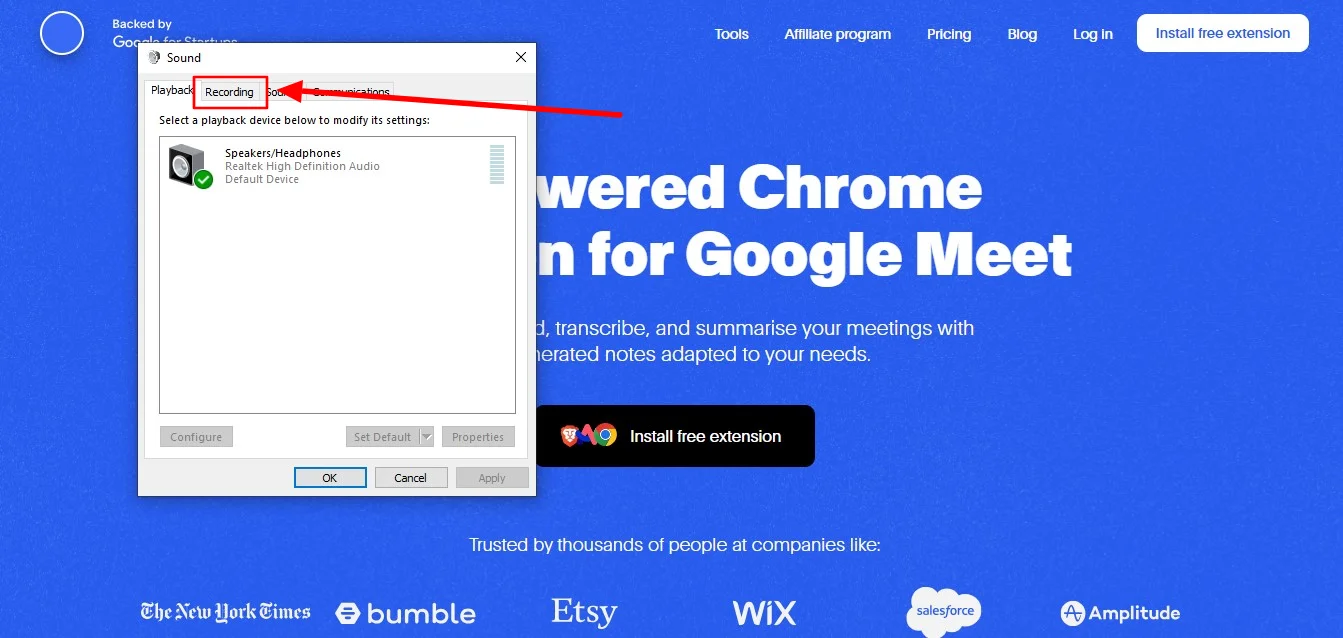
3. Navigate to the Recording tab and right-click on your microphone.
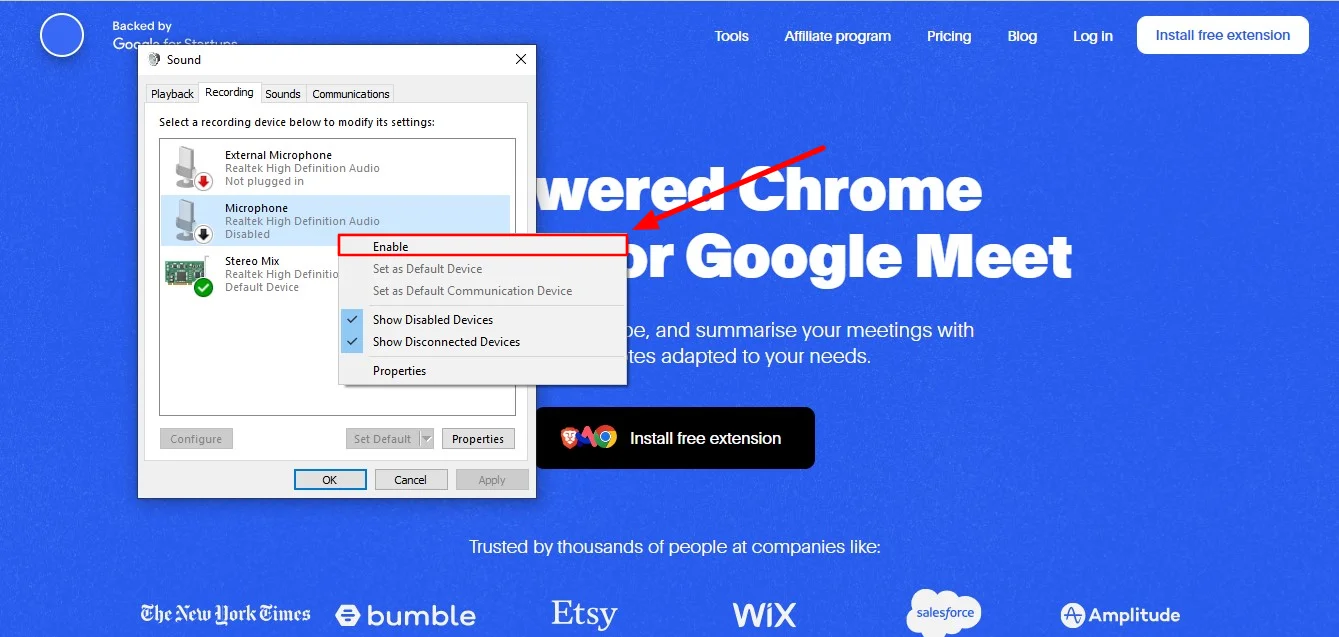
4. From the context menu, select the Enable option.
5. Choose your microphone and click the Set Default button.
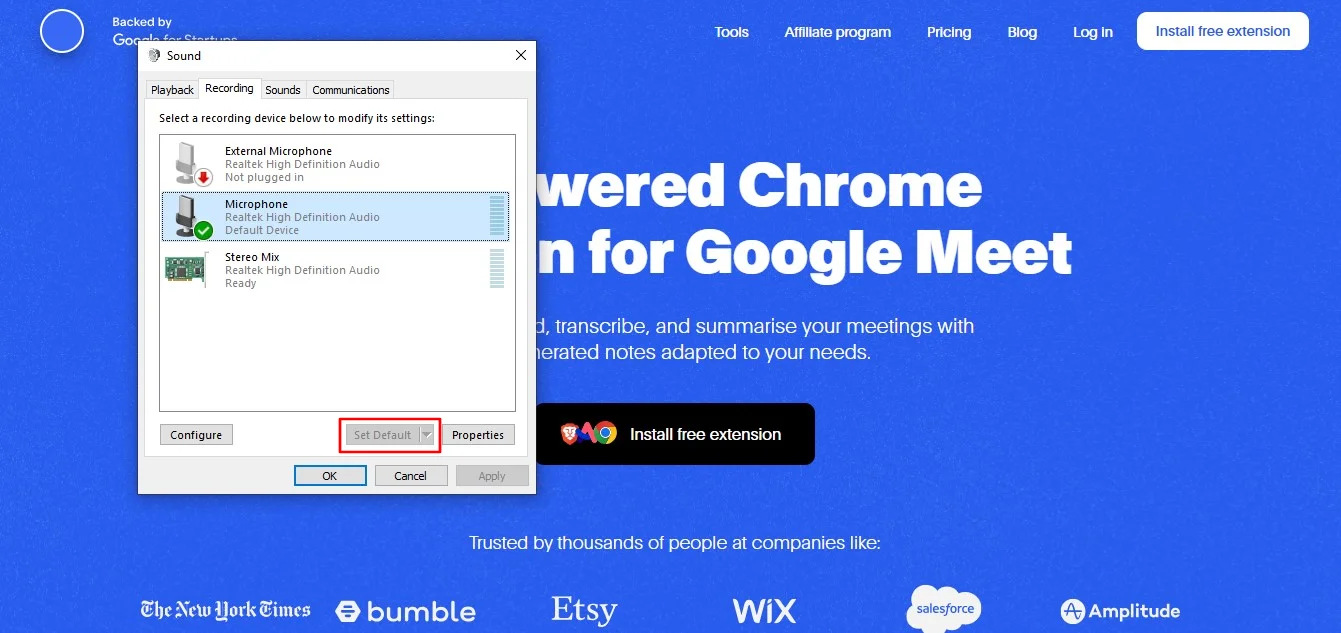
6. Right-click on your microphone again and select Properties.

7. Go to the Levels tab, drag the volume slider to the maximum, and click OK.
5. Make sure your Google Meet settings are accurate
Confirm that the microphone functions properly on the other end. While the audio is clear on your side, the problem could originate from the other end, where Google Meet attendees may encounter microphone issues. You request them to address their microphone concerns to ensure smooth communication during the Google Meet session.
To troubleshoot potential issues with Google Meet audio, it's crucial to ensure that the settings are properly configured and correctly. Test the audio settings with your team to ensure proper functionality.
It's important to note that even if you cannot hear your audience, you should still be able to see everyone in the Google Meet session.
Conclusion
By implementing the troubleshooting methods outlined in this guide, users can overcome sound-related challenges and ensure effortless communication during their Google Meet sessions. However, effective communication extends beyond audio troubleshooting.
For comprehensive meeting management, recording, and playback capabilities, consider utilizing Bluedot's google meet ai assistant. With its user-friendly interface and advanced features, Bluedot emerges as the optimal solution for recording Google Meet sessions.
Recording your meetings adds another layer of security and can be invaluable for future reference, especially when someone is sharing their screen. With a recording from Bluedot, you can easily revisit those steps later or share them with colleagues who missed the meeting.
It doesn't just transcribe your meetings, it also records them and generates comprehensive meeting notes, all while preserving crystal-clear audio quality. So, elevate your Google Meet experience with Bluedot and unlock the power of effortless recording, clear transcriptions, full audio output, and collaborative note-taking!


